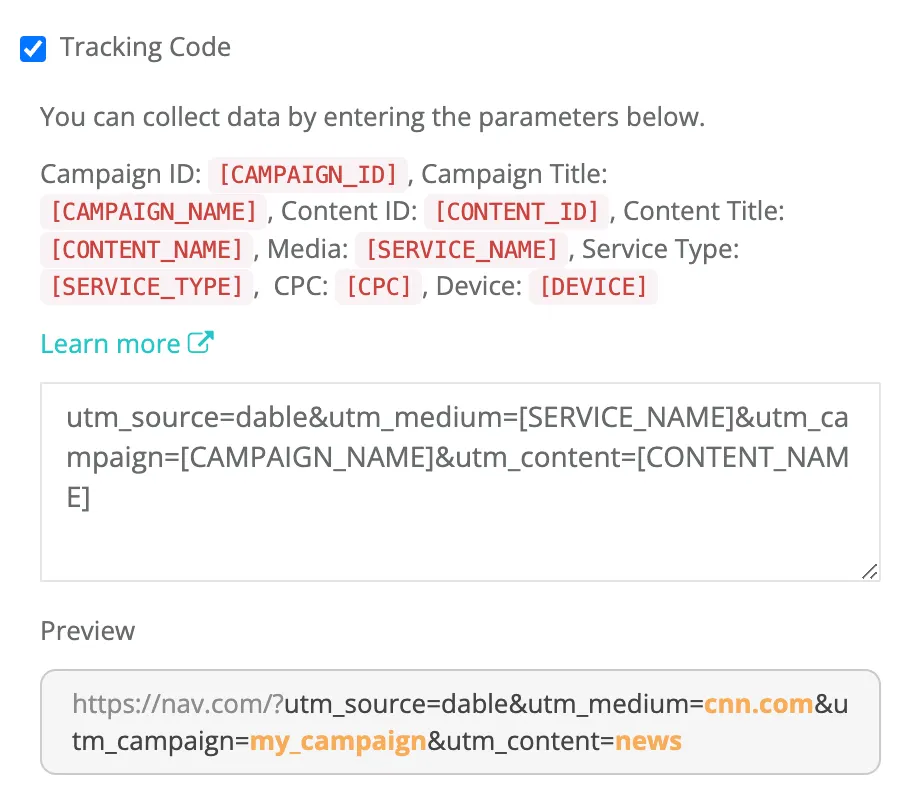
If you enter a URL tracking code when you create your content, it will be embedded in your landing page URL so that you can monitor the behavior of users who click on your content.
You can customize the parameters to suit your needs. You can enter up to 8 parameters, and you cannot enter the same parameter. Also, characters other than English case, numbers, [], +, -, and _ are not allowed in parameters.
You can enter a passback macro in the URL parameter to receive the desired information as a passback.
Dable supports the following passback macros.
•
[CAMPAIGN_NAME] : The campaign name is passed.
•
[CAMPAIGN_ID]: A unique ID for each campaign.
•
[CONTENT_NAME]: Content title is passed in.
•
[CONTENT_ID]: A unique ID for each content.
•
[SERVICE_NAME]: The name of the medium is passed.
•
[SERVICE_TYPE]: The category of the medium is passed.
•
[CPC]: The bid price is passed in.
◦
CPC is Base64 encoded value of UTF-8 string
◦
CPC price is always provided in KRW, not the client's local currency.
•
[DEVICE]: Information about what device the user was using, such as desktop, mobile, tablet, etc.
•
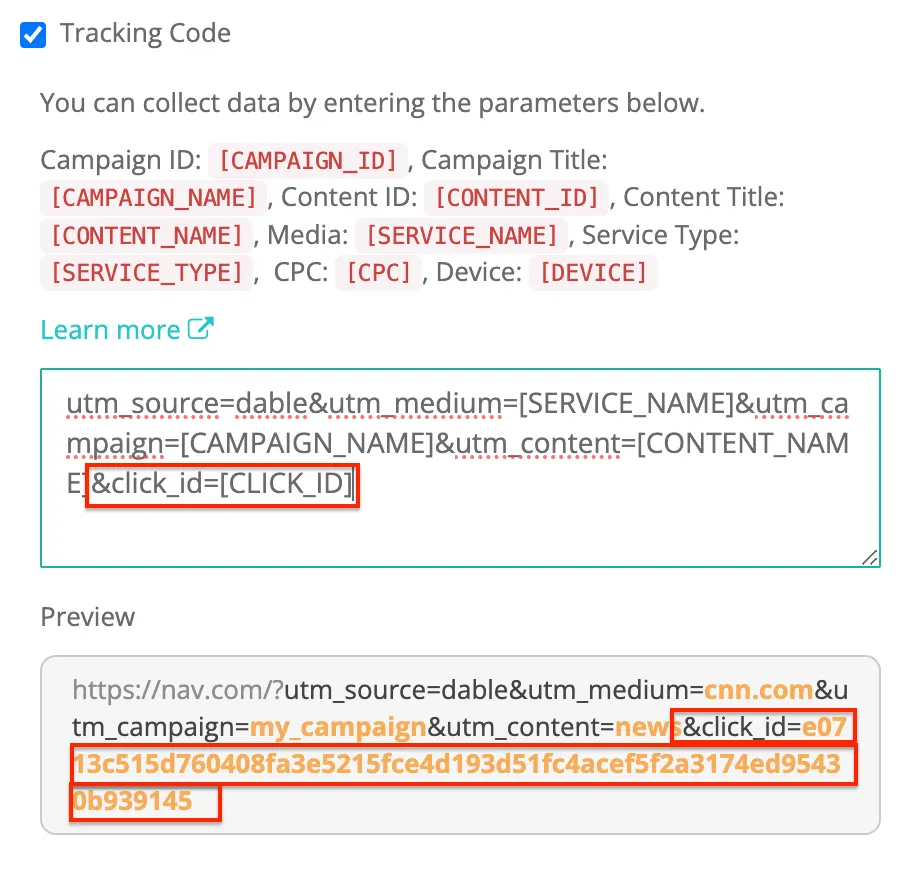
[CLICK_ID]: This parameter must be entered when using Server to Server (S2S) conversion tracking. Each time a user clicks on content, relevant information is passed.
How to use S2S (Server to Server) conversion tracking
You can use S2S conversion tracking if you don't want to use Dable scripts or mobile app integration tools. If you are an advertiser looking for S2S integration, please contact your Dable business manager.
When using S2S conversion tracking, be sure to add click_id to the parameters when creating content.
Input format : URL + &click_id=[CLICK_ID]
Adding the [CLICK_ID] parameter will generate a randomized click ID for each click on your content, which will be put into the corresponding macro parameter, allowing you to track data with that value later.
Once you've received the value via the parameter, send a conversion event to Dable Server instead of the conversion event code with that CLICK_ID value and EVENT information in the postback URL for that conversion.
Please change the values corresponding to :click_id and :event in the postback URL as shown below.
(Dable only supports the ‘get’ method, so it won't work with the ‘post’ method).
POSTBACK URL : https://ad-log.dable.io/postback/s2s/:click_id/:event
1.
Fill in :click_id with the value generated by replacing the [CLICK_ID] value from the click of the Dable user. This value is used for internally only. It must be populated with the same value as the [CLICK_ID] value generated at the time the click occurred so that the conversion is linked to the initial click.
2.
:event Fill in the value with the event name that corresponds to the conversion event in the table
ex) click, install
[Example]
https://ad-log.dable.io/postback/s2s/abcdefgh/lead
Types of conversion events supported by Dable
(Every event name needs to be written in lowercase letters)
•
registration
•
lead
•
adview
•
inlinkview
•
visit
•
checkout
•
content
•
search
•
cart
•
wishlist
•
payment
•
login
•
install
•
re_install
•
re_engagement
•
app_open
•
purchase
◦
If the conversion event is a ‘purchase’, you should also include ‘price’ in the URL.
◦
[example] https://ad-log.dable.io/postback/s2s/abcdefgh/purchase?value=10000¤cy=KRW
How to set up Voluum
Add a Traffic Source to Voluum from a Template
To run a campaign, you first need a steady stream of traffic to target. Traffic sources provide you with these visitors. You need to configure the traffic source element in Voluum to be able to set up a campaign. The following article will describe creating the new traffic source for the redirect method of tracking.
Templates
Voluum traffic source templates provide predefined configurations for creating the new traffic source element effortlessly. All necessary field configuration fields will be filled with the selected traffic source's default setting. You will be able to edit them if need be.
Zeropark is already added to your account for your convenience, so it is not listed here.
Creating the New Traffic Source from a Template
The following steps will guide you how to configure a traffic source based on the Voluum template:
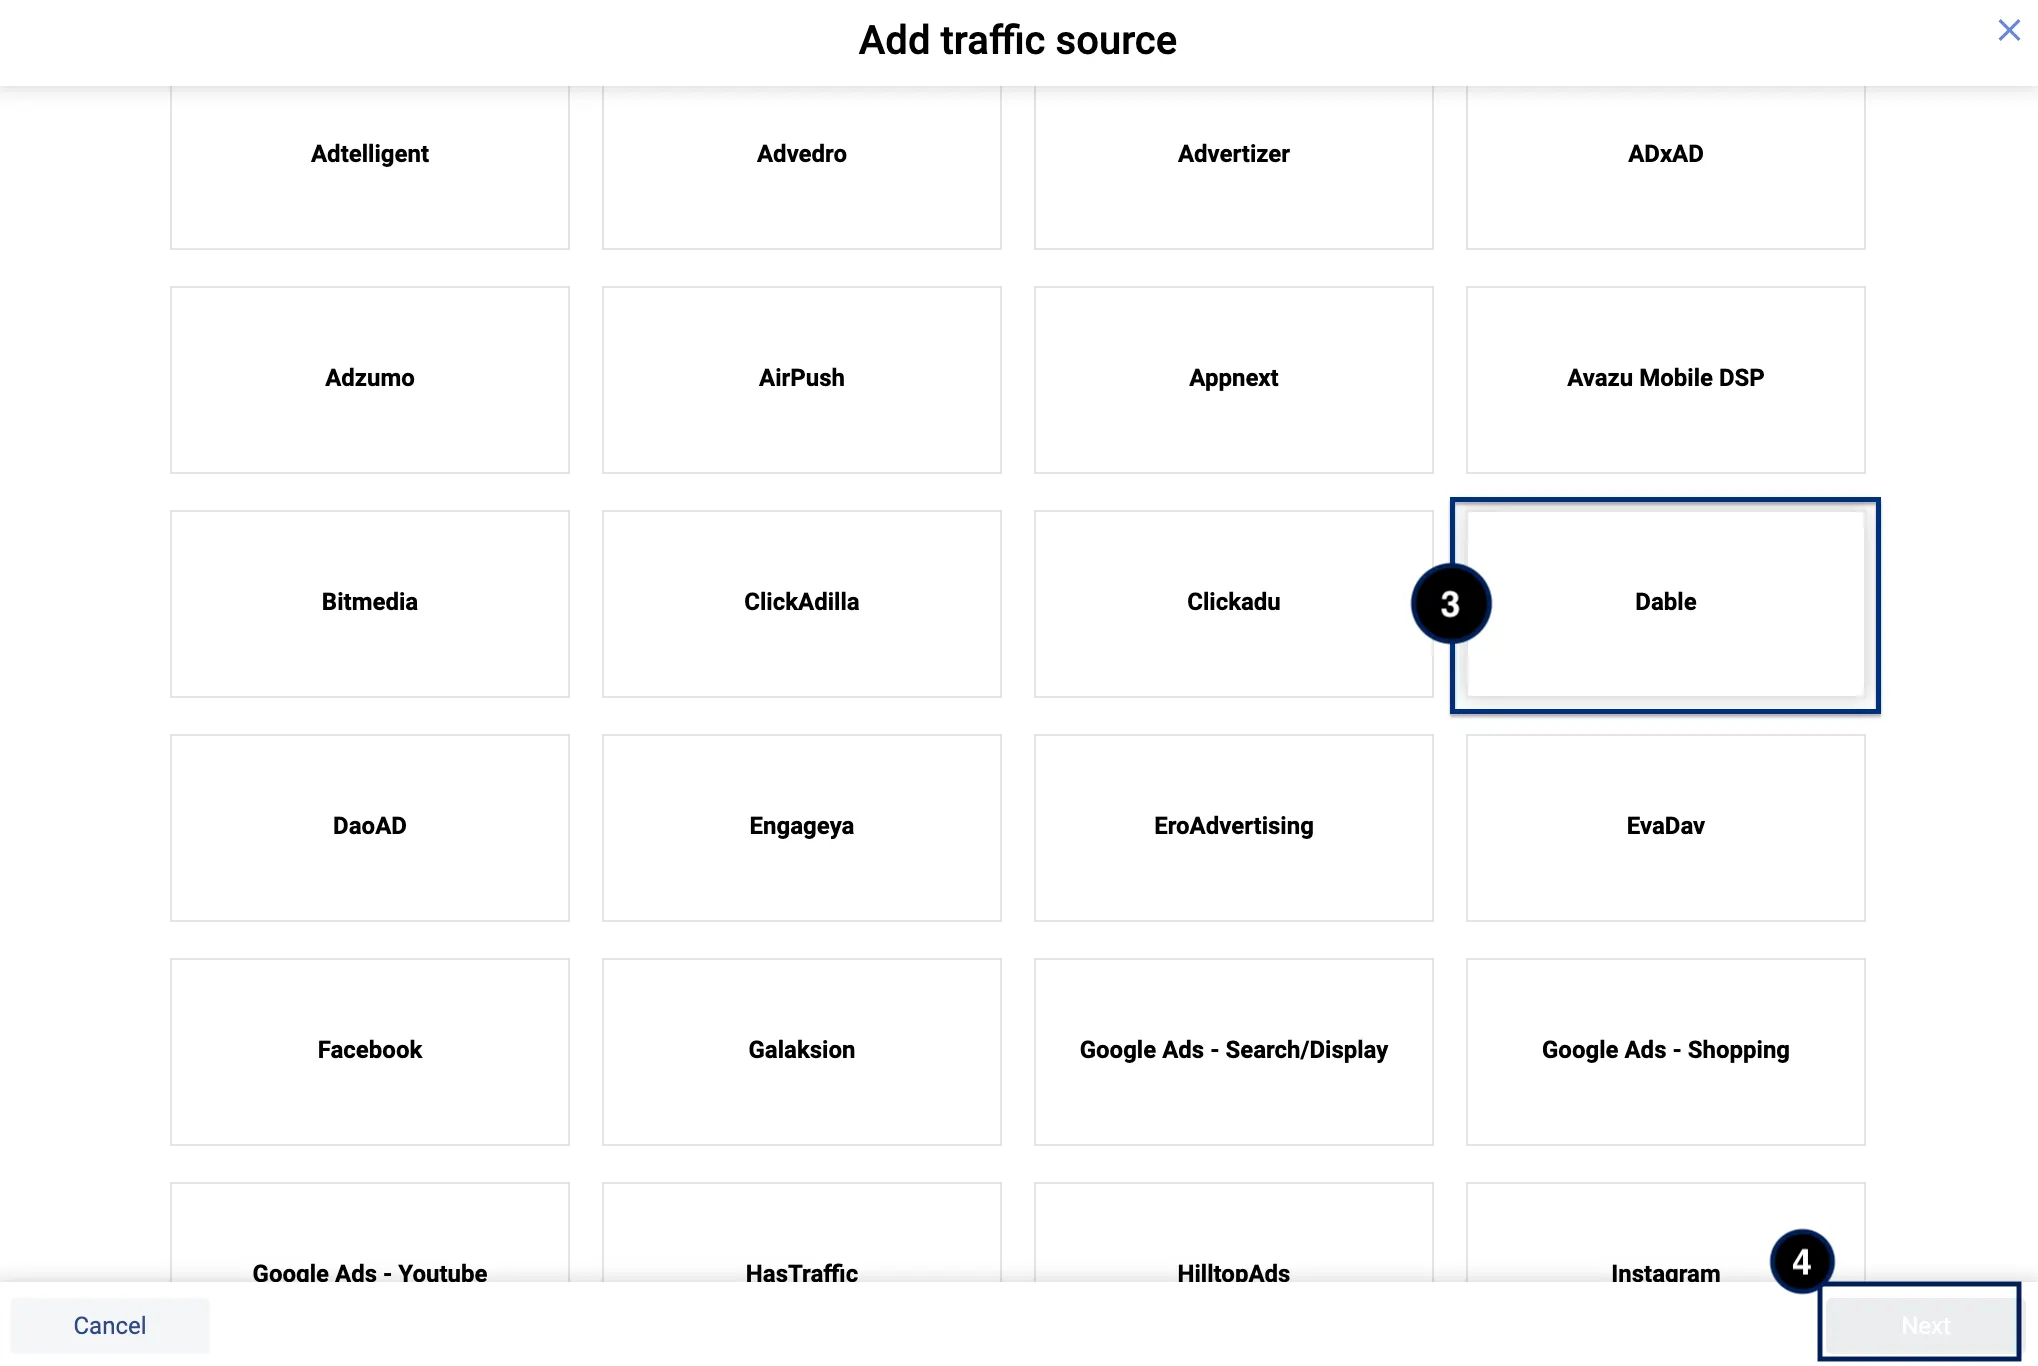
1.
In Voluum, go to Traffic sources.
2.
Click the Create button and select the Traffic source option from the drop-down menu.
3.
Select the template that you want to use by clicking it.
4.
Click the Next button.
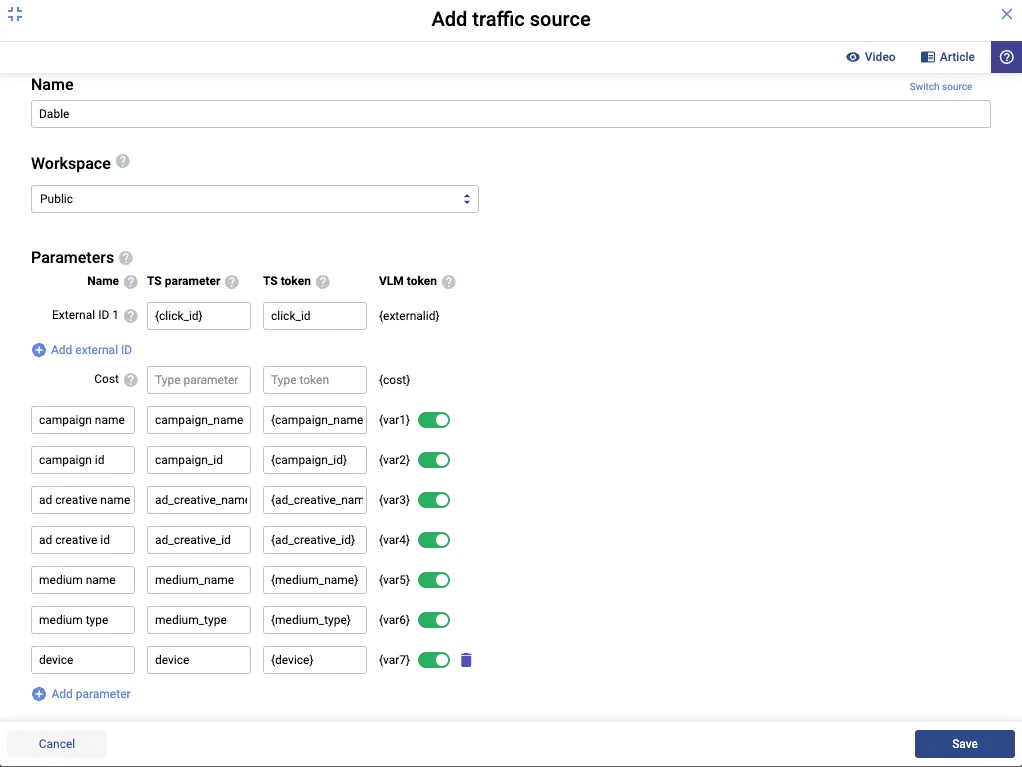
5.
When you load a Voluum traffic source template, all options and text fields are already filled up with default settings. You do not need to change any option or provide any additional information to be able to use this traffic source element in your campaign funnel. However, you can edit any setting you want if you like. To learn more about different options available when creating a traffic source element, read the Add a Custom Traffic Source to Voluum article.
6.
Click the Save button.


.png&blockId=b9bb7e77-1815-44cc-9cc1-1eca3464e019)


